My Astrophotography Setup
I started doing astrophotography in college using an analog Olympus digital camera. I couldn’t really afford a telescope back then so the only astrophotographs I took were star trails. Fast forward 25 years later and I actually got a job as neurosurgeon. This meant 1: more income for buying astrophotography gear but 2: less time to do it. That’s the irony of life I guess. I’ll get to how to overcome 2 in a future post. I had been researching astrophotography gear for those past 25 years and in August of 2022 it was time to bite the bullet and buy the gear. I prefer to support local businesses, especially camera and photography gear since they’re getting taken over by large online stores. There’s still something special about walking into a brick and mortar telescope store where you can actually see the equipment and talk to the salespeople. This particular day I walked into Woodland Hills Camera and Telescope and bought a very large amount of gear. The salesman looked at me and said “Hey I just want you to know this is going to be a lot of money. Just making sure.” I replied, “Yes I know, I’ve been waiting 25 years. Ring it up.”
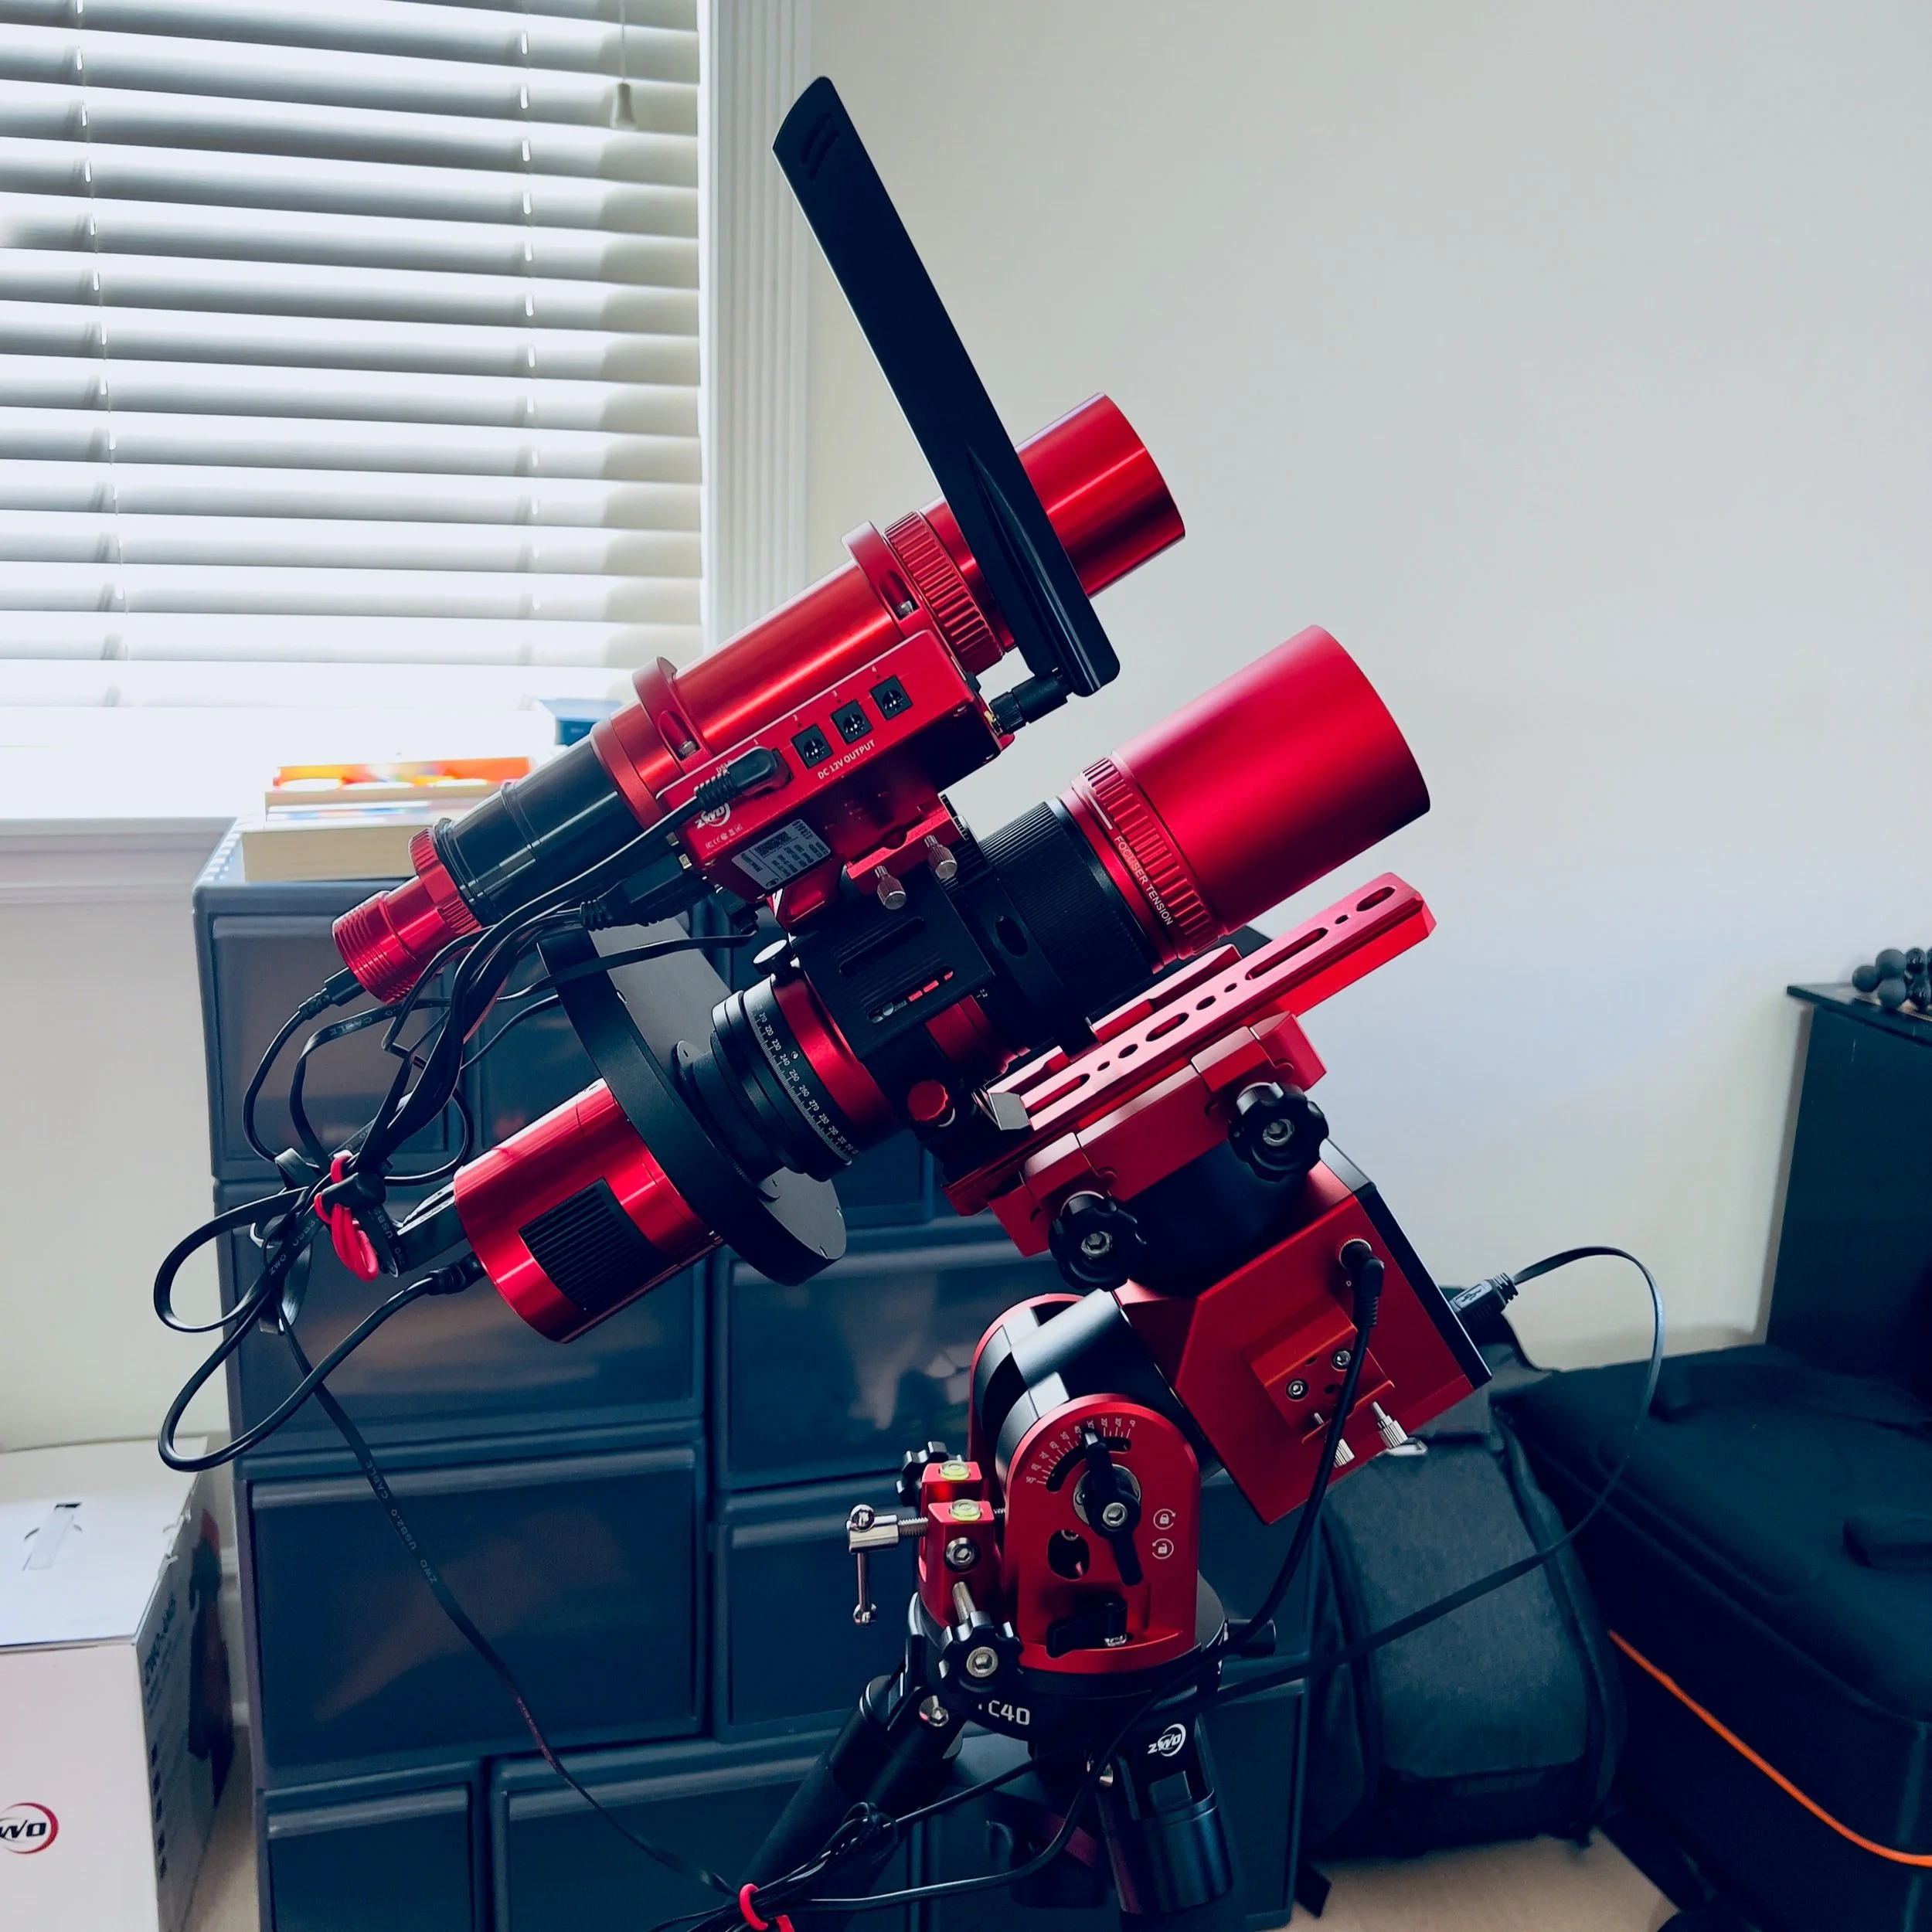
A “beginner” astrophotography setup.
Pictured here is my current setup (with some slight modifications over the past year). The basic setup for astrophotography consists of the following:
A decent mount. This is where you should not compromise on quality. It needs to be automated, and capable of bearing the weight of your equipment. The mount is what keeps the telescope and camera pointed to a single point in the sky. This is critical since the mount has to counteract the Earth’s rotation to keep the stars from trailing on the image. This requires a lot of technology, software and troubleshooting and is a subject in itself. I decided to go with the ZWO AM5 harmonic mount. It’s not the best in the world (those can cost upwards for $10k) but it gets the job done.
The telescope. I went with two separate telescopes. A Celestron EdgeHD 8 inch reflector (not pictured) and the RedCat 51 pictured here. The RedCat is a good entry level telescope. It has a 250mm focal length and shoots at around f5. This means it’s reasonably “fast” and can capture larger objects in a single frame such as the Andromeda galaxy. A lot of people are surprised at the modest size of this scope but remember size doesn’t matter. It’s focal length and f ratio and what you’re trying to image. For wide field astrophotography of nebulae you need a small focal length to fit wider regions of sky in a single shot. In some cases you don’t even need a telescope: for very wide field astrophotography you’re better off with a wider field camera lens like the Rokinon 14mm f2.8. On the other hand, if you want to shoot smaller, dimmer objects like smaller galaxies then you need a longer focal length scope with a wider aperture.
The camera. Astrophotographers usually use specialized cameras that are powered and cooled to reduce noise. I went with the ZWO ASI533MM Pro. I opted for the smaller chip size since I wouldn’t be taking advantage a larger image sensor anyways with the RedCat telescope. If you want to learn more about that, look up image circles.
The rest of the equipment consists of an electronic filter wheel (EFW) that contains 7 slots for 7 different filters: R,G,B,SII, OIII, Halpha and luminance. This allows for narrowband imaging. Many astrophotography targets such as nebulas emit light at very specific wavelengths and narrowband filters allow you to capture those specific wavelengths even in light polluted skies. I also have an electronic autofocuser (EAF) which allows my software to periodically re-focus the system throughout the night automatically. I used a special 3d printed kit made by Deep Sky Dad (https://deepskydad.com/) to mount the EAF to my RedCat.
Finally, you need a computer to control everything. I started out using the ASIair Plus computer but eventually graduated to using a custom made Intel NUC running Voyager automation software (https://software.starkeeper.it/). With the ASIair you have to take your mount outside and set it up each night and then bring everything back indoors when finished. This is extremely time consuming as every time you move the mount, you have to recalibrate everything which itself can take about 10 minutes (once you’re good at it). If it rains or gets cloudy, you have to move everything indoors. I ultimately built an outdoor observatory which houses my entire setup and allows me to leave it outside 24/7. The observatory is completely automated with sensors that open and close the roof based on weather and seeing conditions. You simply enter a list of targets you’re interested in imaging and Voyager will automate the imaging overnight. If clouds roll in, the observatory will shut down and put everything to sleep. No need to set up and tear down or stay up all night to image. You pick your targets, and either go do neurosurgery or go to sleep. The next day, all the images are stored in a folder waiting to be processed.
The end result is this image of the Andromeda galaxy I took with the above setup taken from my balcony over the course of several days. It’s crazy to think that this is actually out there, 2.5 million light years away.
